GitHub Integration With Azure: Part 2
Now, our GitHub repository and Azure Web App setup are ready. Let us implement the CI/CD pipeline with GitHub Actions.
GitHub Actions is a feature for automating various activities associated with a GitHub repository. GitHub Actions are triggered by events. GitHub has a wide range of events such as creating a pull request, opening an issue, forking a repository, pushing code to a repository, etc., that can trigger actions. We can define a set of activities that will be executed when any specific events are triggered.
Step #1: Configure GitHub secret
To allow GitHub Actions to deploy our code to Azure Web App, we must authorize GitHub.
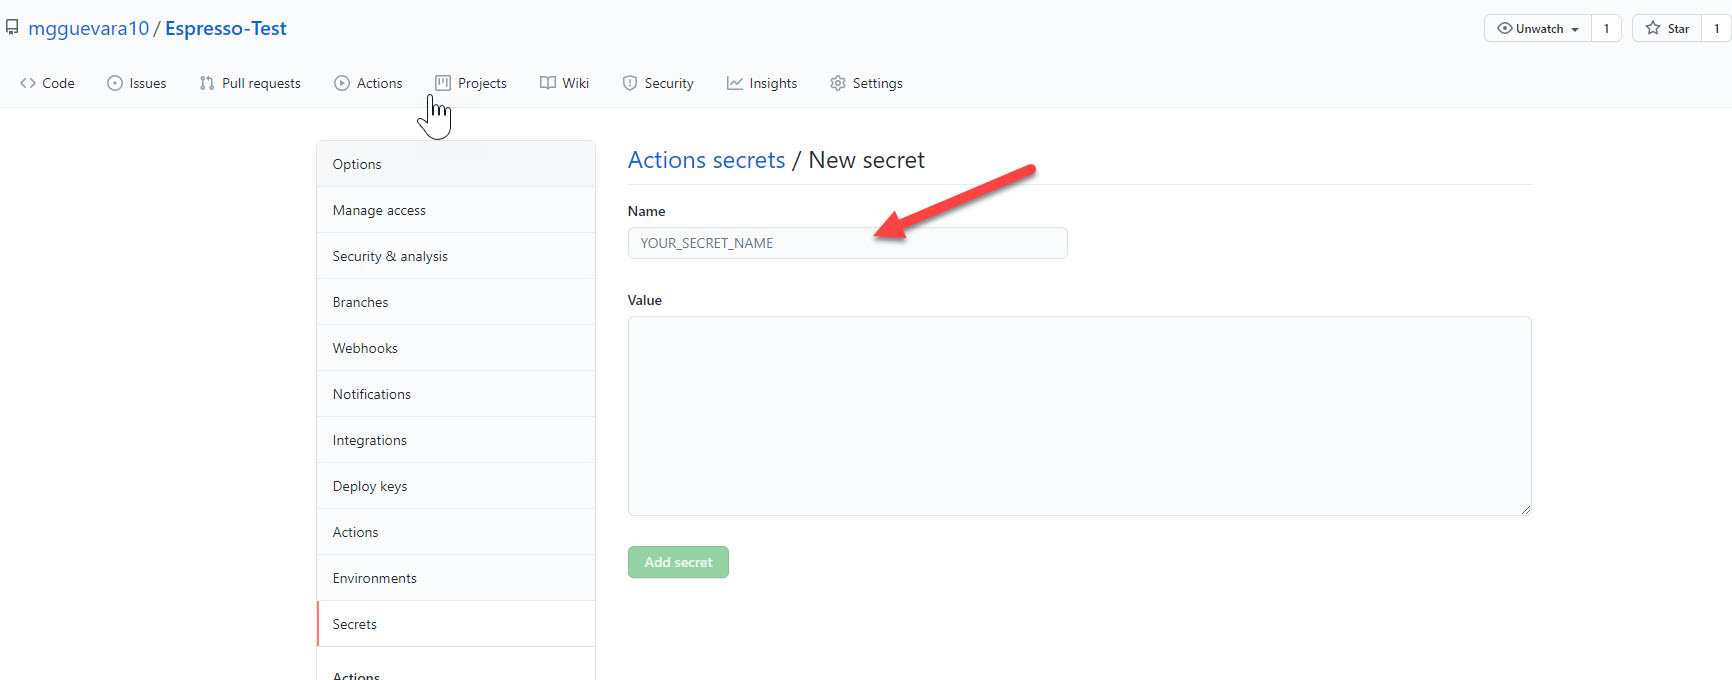
Go to the `coffee-app` repository page in GitHub. Click on `Settings` in the horizontal menu, and then click on `Secrets` in the vertical menu. You will get this page since we have not configured any secrets yet.

Click on `New repository secret.` Then, copy the contents of the
`your_application_name.PublishSettings` file that we have downloaded in the previous section, and paste it to the value field.
Give the name `AZURE_WEBAPP_PUBLISH_PROFILE` and click on `Add secret’.
Step #2: Initialize GitHub Actions
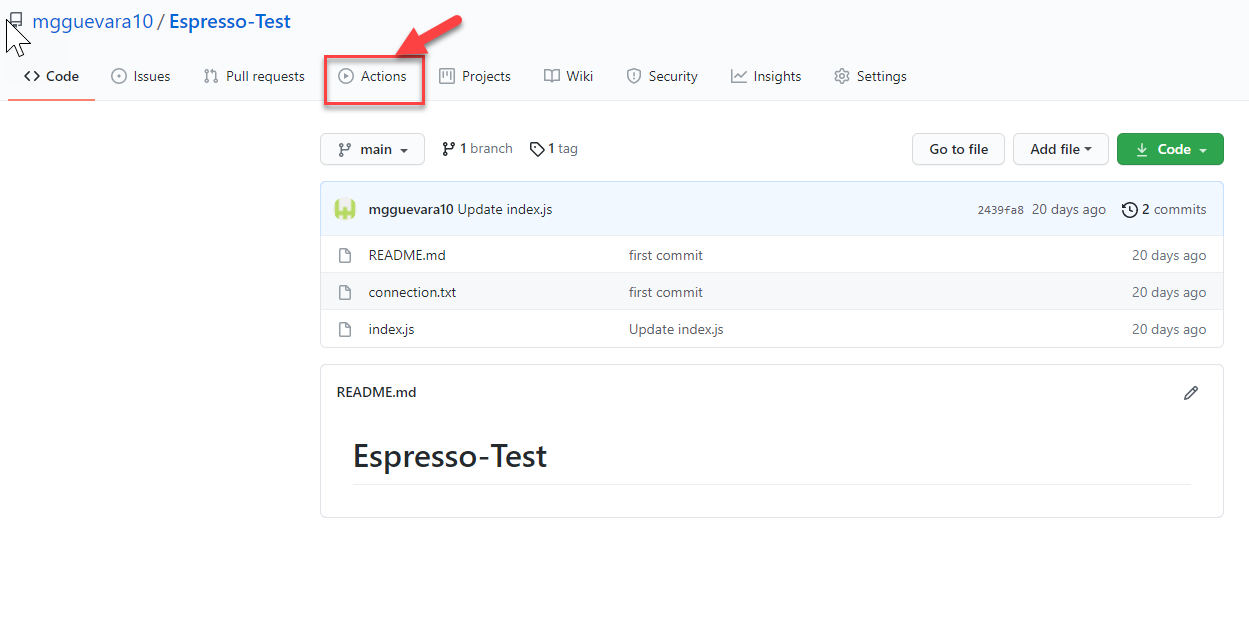
Go to the `coffee-app` repository page in GitHub. Click on `Actions` in the horizontal menu.
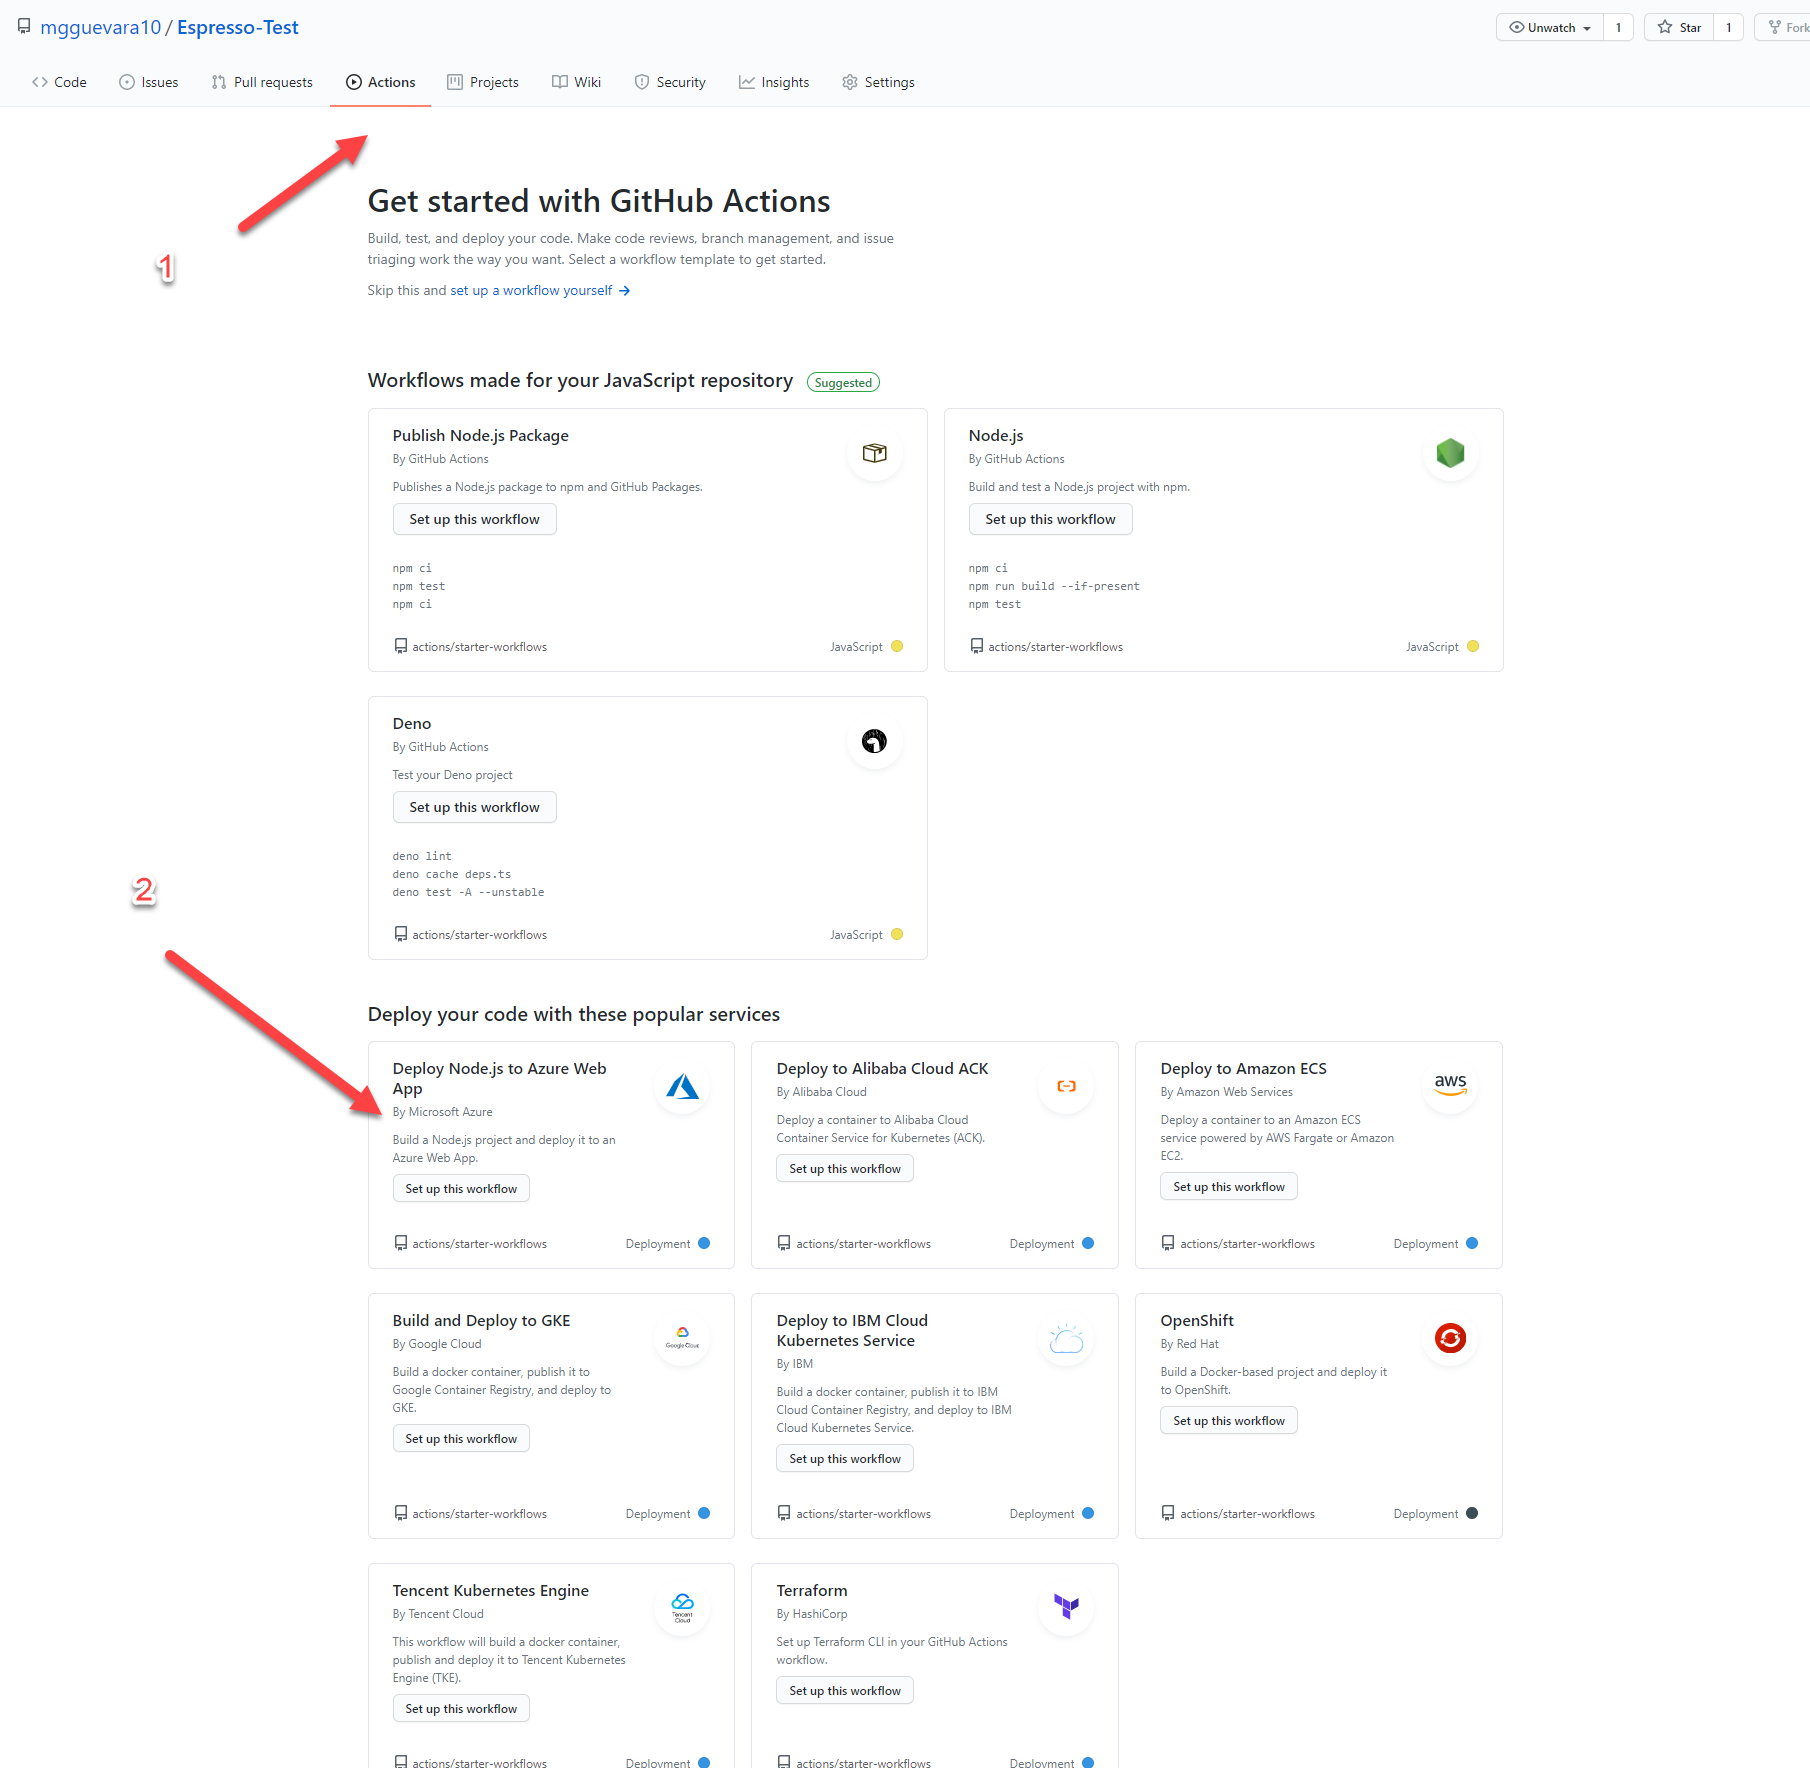
GitHub provides a set of pre-compiled actions for common use cases. In the ‘Deploy Node.js to Azure Web App` box, click `Set up this workflow.`
Step #3: Update azure.yml
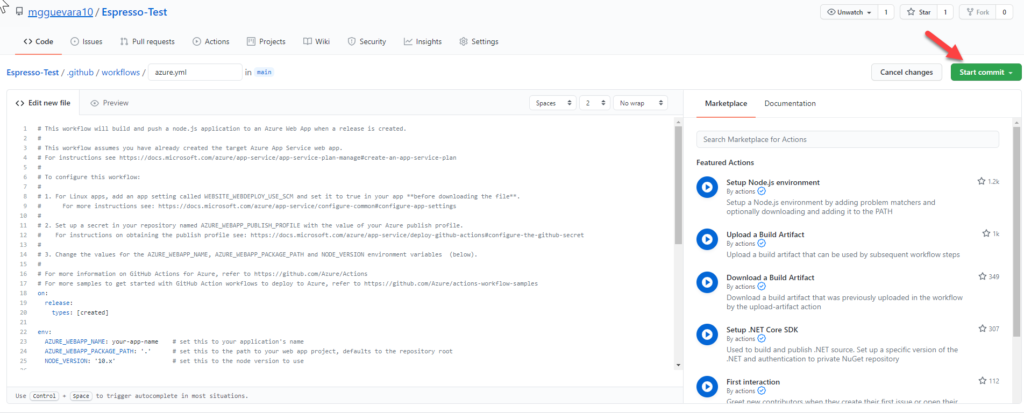
We get to edit a file named azure.yml file, which defines the GitHub Actions. This file has a set of default parameters set by GitHub. We have to update them according to our application setup.
In this file, update the `AZURE_WEBAPP_NAME` to the name web app in Azure.
The parameter `AZURE_WEBAPP_PACKAGE_PATH` must be set to the path of the web app. Since our Node.js app is at the root of our repository we can keep `.` as default.
The `NODE_VERSION` must be set to the appropriate Node.js version. We shall set it to`14.x`.
Our Node.js application has no external dependencies. So, we have not created the `packages.json` file in our repository. But, this `azure.yml` file has a step named `npm install, build, and test.` It has a series of commands that uses `npm.` Remove this part entirely since we are not going to use it.
- name: npm install, build, and test run: |
  # Build and test the project, then
  # deploy to Azure Web App.
  npm install
  npm run build --if-present
  npm run test --if-present
This is our final `azure.yml` file.
on:
  release:
 	types: [created]

env:
AZURE_WEBAPP_NAME: PuraVida-coffeeapp	# set this to your application's name

to your web app project, defaults to the repository root
version to use jobs:

 	environment: production
 	steps:
 	- uses: actions/checkout@v2
 	- name: Use Node.js ${{ env.NODE_VERSION }}

 	jobs:

	environment: production
 	steps:
 	- uses: actions/checkout@v2
 	- name: Use Node.js ${{ env.NODE_VERSION }}

 	uses: actions/setup-node@v2
 	with:
 	node-version: ${{ env.NODE_VERSION }}
 	- name: 'Deploy to Azure WebApp'
 	uses: azure/webapps-deploy@v2
 	with:
 	app-name: ${{ env.AZURE_WEBAPP_NAME }}
 	publish-profile: $
{{ secrets.AZURE_WEBAPP_PUBLISH_PROFILE }}
 	package: ${{ env.AZURE_WEBAPP_PACKAGE_PATH }}
You may note that it’s referring to `AZURE_WEBAPP_PUBLISH_PROFILE` parameter that we just created.
After updating all these changes in `azure.yml,` click on `Start commit` on the upper right side, and commit the `azure.yml` file.
GitHub Actions are executed at certain events. You may have noted this part in the `azure.yml.`
on:
  release:
 	types: [created]
It means that the defined actions are executed when a `release` event is triggered. So, let’s create a new Release in GitHub.
Go to the GitHub repository page. In the middle left, there is a section named `Releases.` We do not have created any release so, click on `Create a new release.`
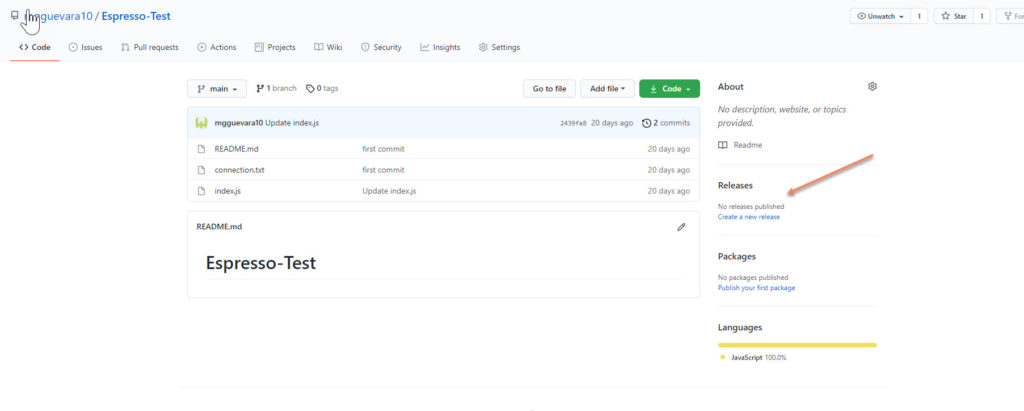
It means that the defined actions are executed when a `release` event is triggered. So, let’s create a new Release in GitHub.
Go to the GitHub repository page. In the middle left, there is a section named `Releases.` We do not have created any release so, click on `Create a new release.`
Fill in the `Tag version,` `Release title,` and `Description` fields appropriately.
Then, click on `Publish release.`

Step #5: Check the workflow
The `release` event we created in the previous section should trigger the GitHub Actions workflow.
Click the `Actions` menu in the repository. You will see the green tick mark if the `workflow` run is successfully completed. If there are any failures, this will be red, and you will have to do some troubleshooting.
Step #6: Check the web app
Go to the web application in the Azure portal and click on `Browse` in the top menu.
We will get the home page of our application.
Step #7: Create a new release
Now, update the application, commit and push the code to GitHub, and create a new release. You will find that the Web App in Azure is automatically updated to the latest version at each consecutive release we create on GitHub.
Conclusion
I provided a low-level technical approach on how to implement a CI/CD pipeline with GitHub Actions to deploy a web app to Azure. If your following along make sure to read part 1.